Are you trying to watch that favorite movie of yours on VLC, but the subtitles are not displaying? I know it can be quite infuriating when you depend on subtitles to understand the language spoken in the video. I have compiled some troubleshooting tips to help you fix the issue with subtitles on VLC.
Videos that you play on VLC, often accompany a SRT file. This is the file extension for subtitles used in translating videos. Subtitles may not show on a video if it is not provided with the source video file. Even though an SRT file was provided for the video, it may have become corrupt.
At times, you may download incorrect subtitle files that will not sync properly with the video when you play it on VLC. Also, you must enable the use of subtitles in the VLC settings. Otherwise, even if you have the correct SRT file for a video, the subtitles won’t display.
Top Ways to Fix VLC is Not Showing All Subtitles
Here are the different troubleshooting tips you can implement to get the subtitles working again for all the videos you play on VLC.
1. Enable Subtitles on VLC
Start the troubleshooting by checking whether subtitles in VLC have been turned off by mistake. To enable subtitles, follow the steps mentioned below.
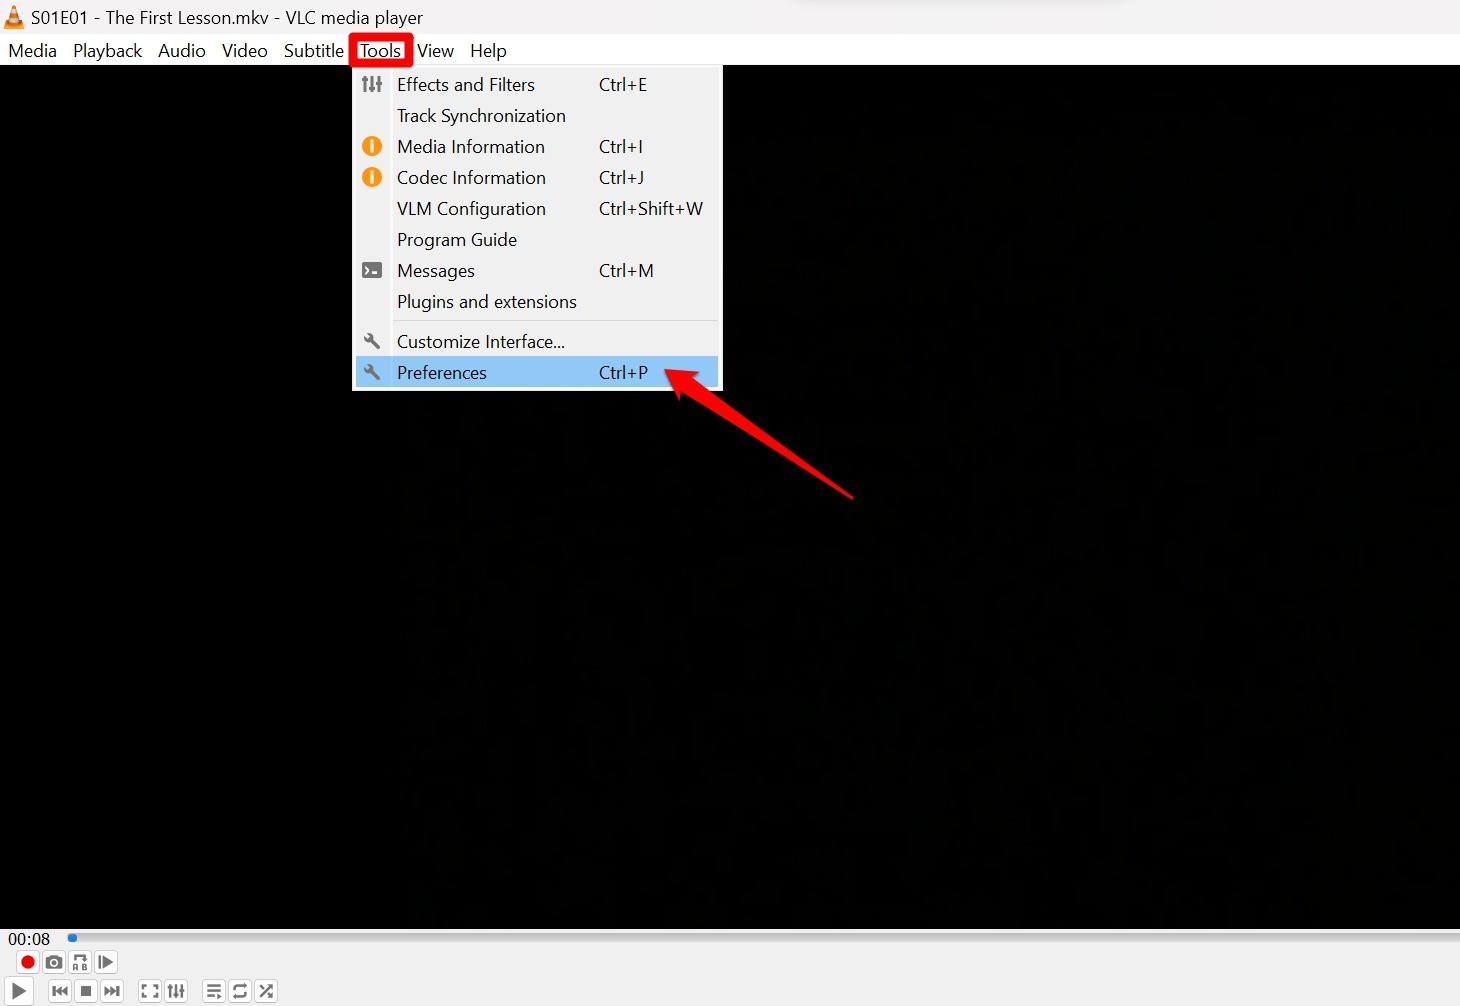
- Launch VLC Media Player on your PC.
- Click on Tools from the menu bar.
- Then click on Preferences.
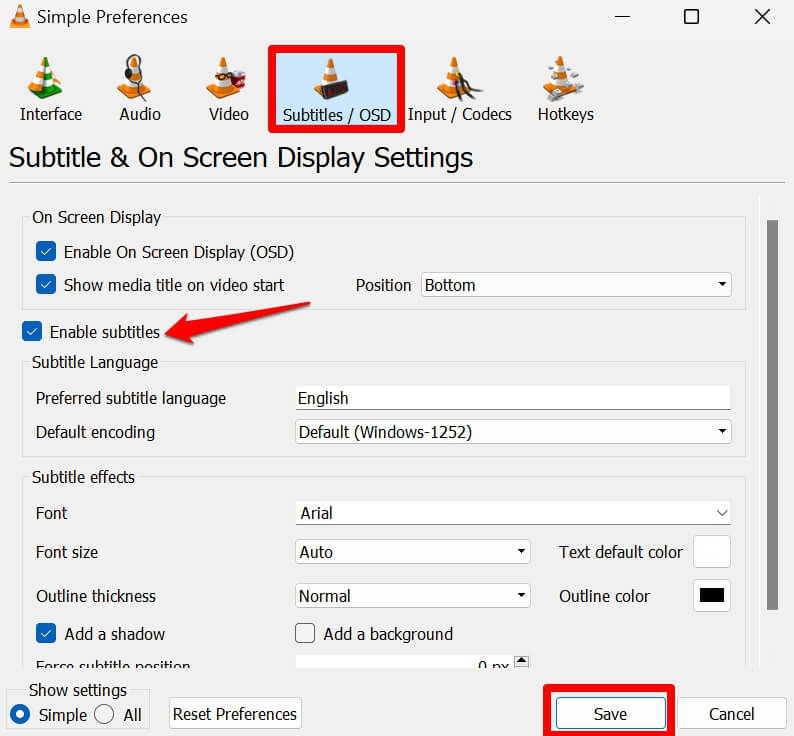
- On the preferences dialog box, click on the tab Subtitles/OSD.
- Scroll down and click the checkbox beside Enable On-Screen Display.
- Also, click the checkbox next to Enable Subtitles.
2. Manually Add Subtitles to a Video
You may notice that there is an existing SRT file for a video but subtitles are not showing when playing the video file on VLC. You should manually add the subtitle to the video.
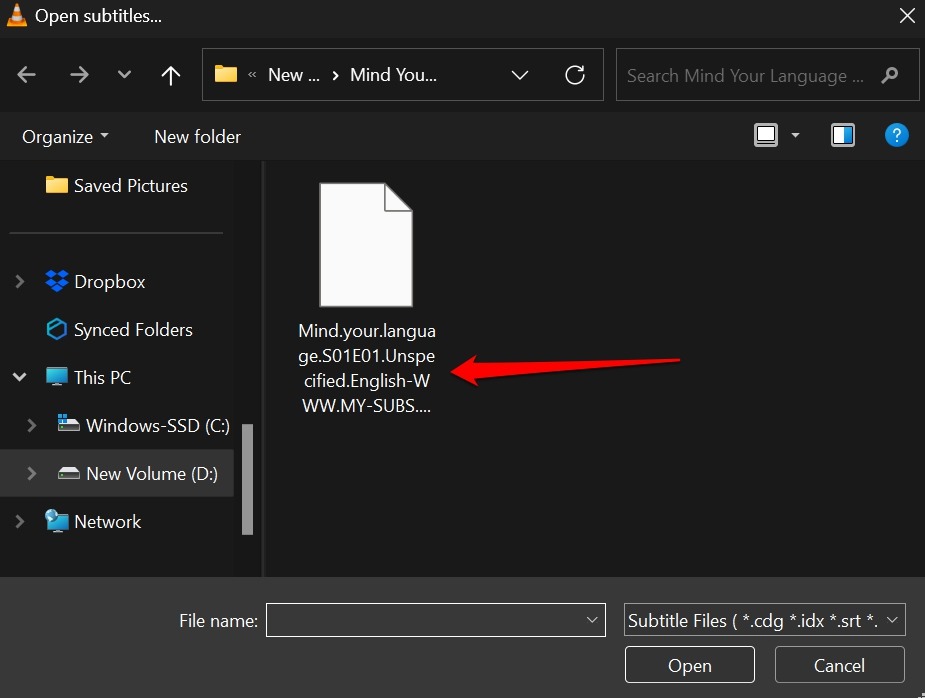
- Open a video file on VLC Media Player.
- Click on Subtitle > Add Subtitle File.

- Browse for the subtitle file on your PC. [you will find it in the same folder as the video file]
- Double-click on the SRT file to add it to the video playing on VLC.
3. Re-download the Correct Subtitle
Most of the time, when you download a video from the internet, it will come with a SRT file. If you notice no subtitle file for the corresponding video, download it from the web.
The SRT file provided with a video you downloaded may have become corrupt. In this case, re-download the correct subtitle file by searching for it on the internet.
I suggest downloading the subtitle from popular websites like subdl.com or SRTfiles.com.
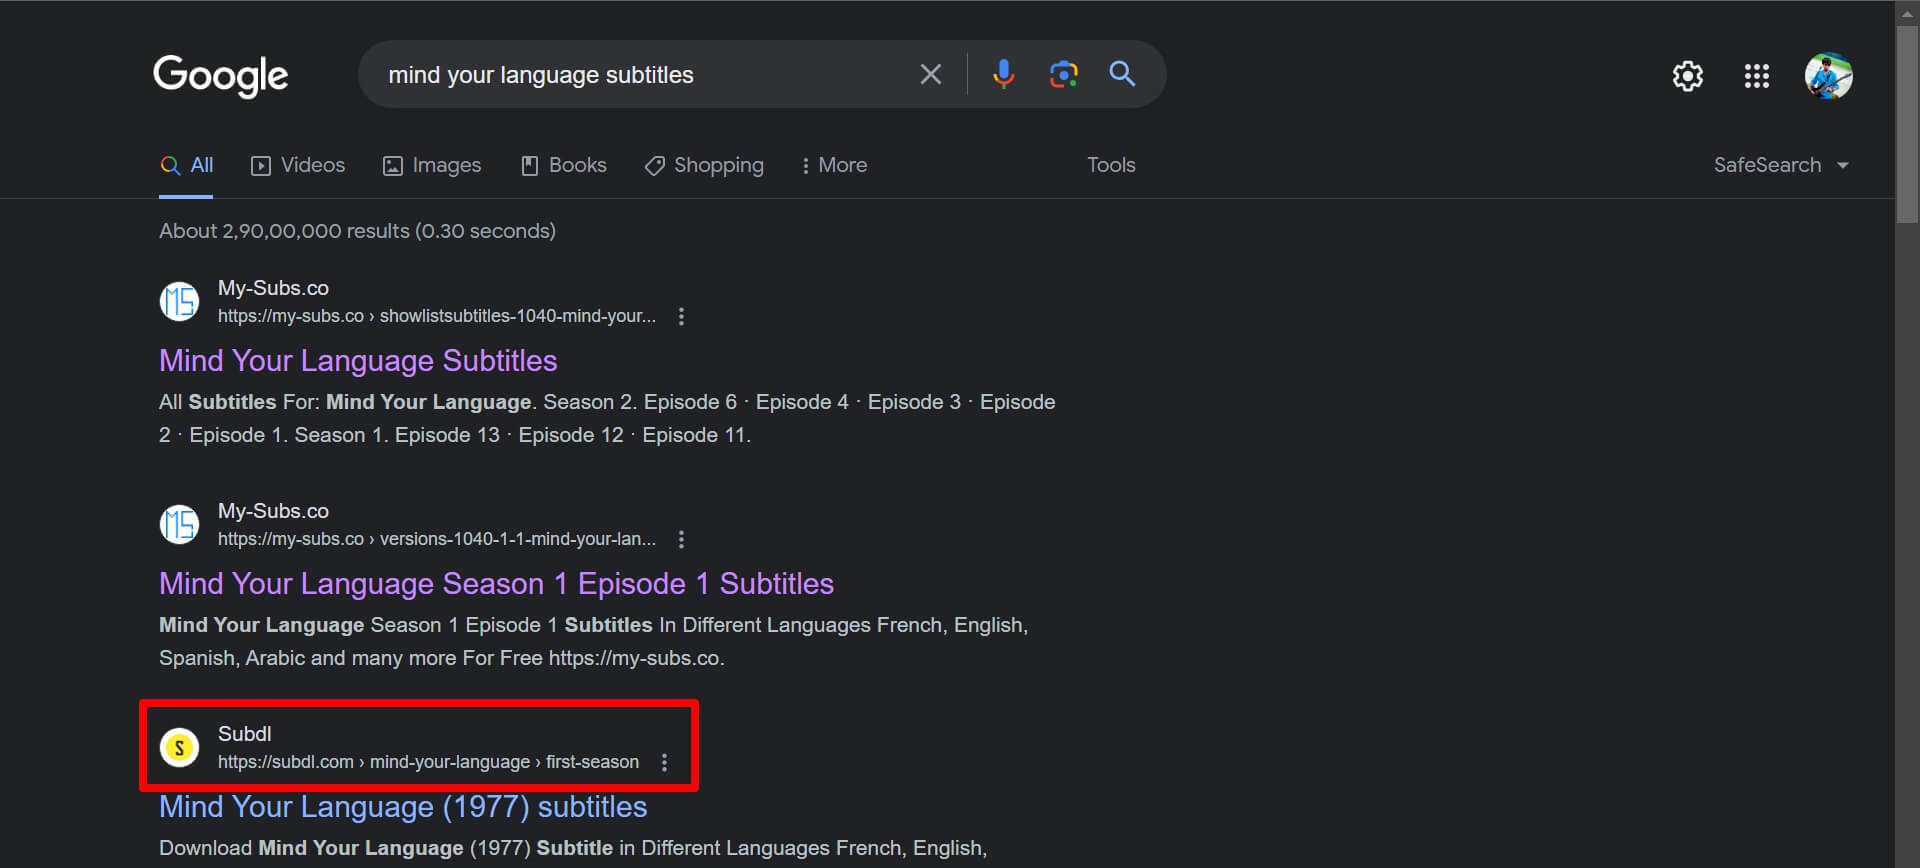
NOTE: We have no affiliation with the above-mentioned sites. I have downloaded subtitles from these sites for playing videos on my computer, and they are safe to use.
Keep in mind that the SRT file for subtitles must be placed in the same folder as the video file it is meant for. Also, the SRT file carries the same name as the video file. Usually, subtitle files are zipped and downloaded to the default Downloads folder of Windows PC.
Extract the SRT file and move it to the same folder where the video file is present. Launch the video in the VLC player, and use the steps described in the previous section to add the subtitle file.
4. Force Close VLC
There may be some glitch on the VLC app, preventing the subtitles from running even though you are using the correct subtitle file. I suggest force-closing VLC and restarting it.
- Press Ctrl + Shift +Esc to launch the Task Manager.
- Under the Apps tab, scroll to VLC, right-click on it, and select End Task.
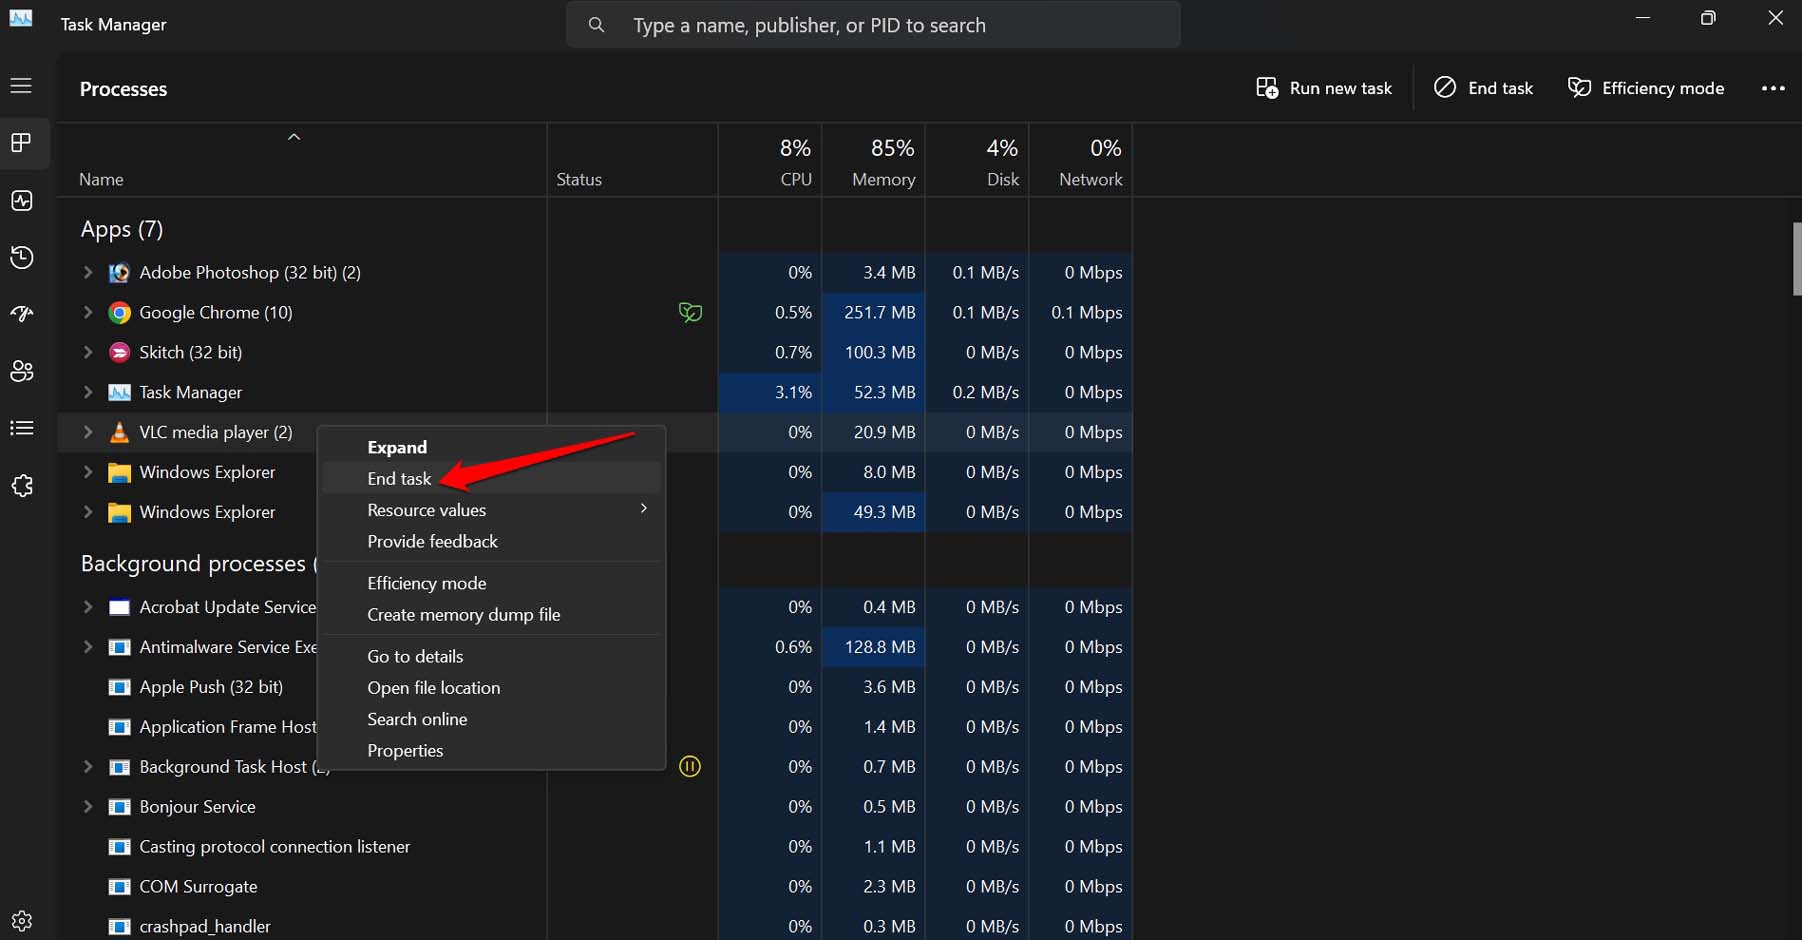
- Exit the Task Manager and restart the computer.
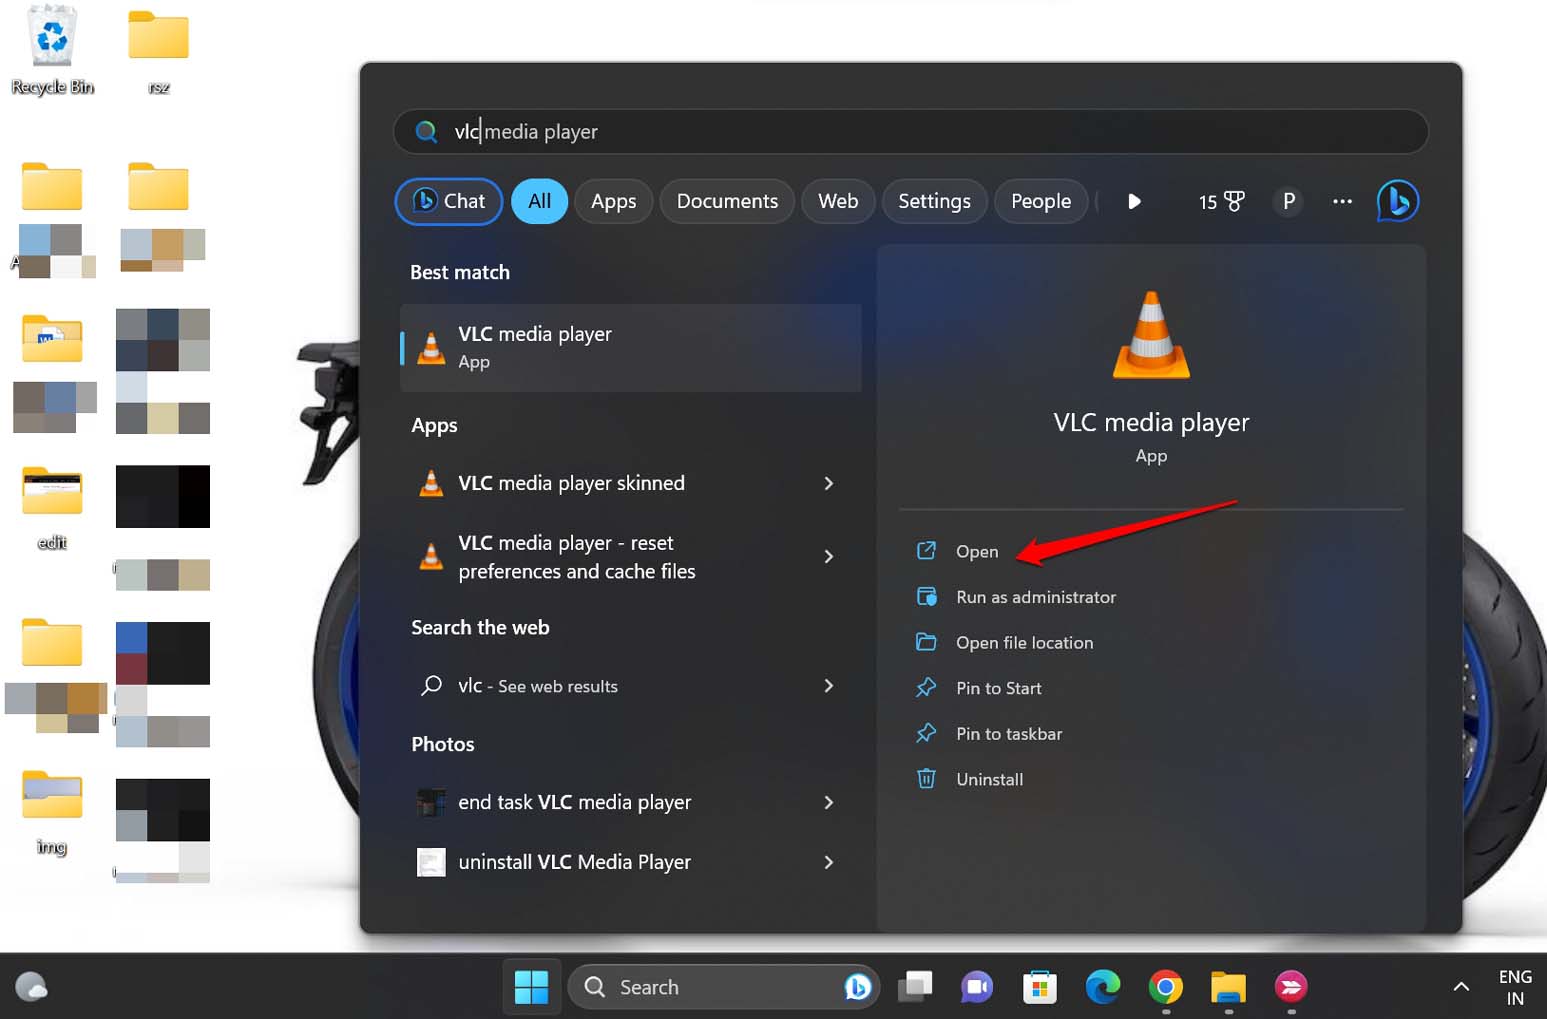
- Once the PC reboots, launch VLC and load the video file.
- If the subtitle is not running by default, add it manually from Subtitles > Add file.
5. Install Pending Updates for VLC
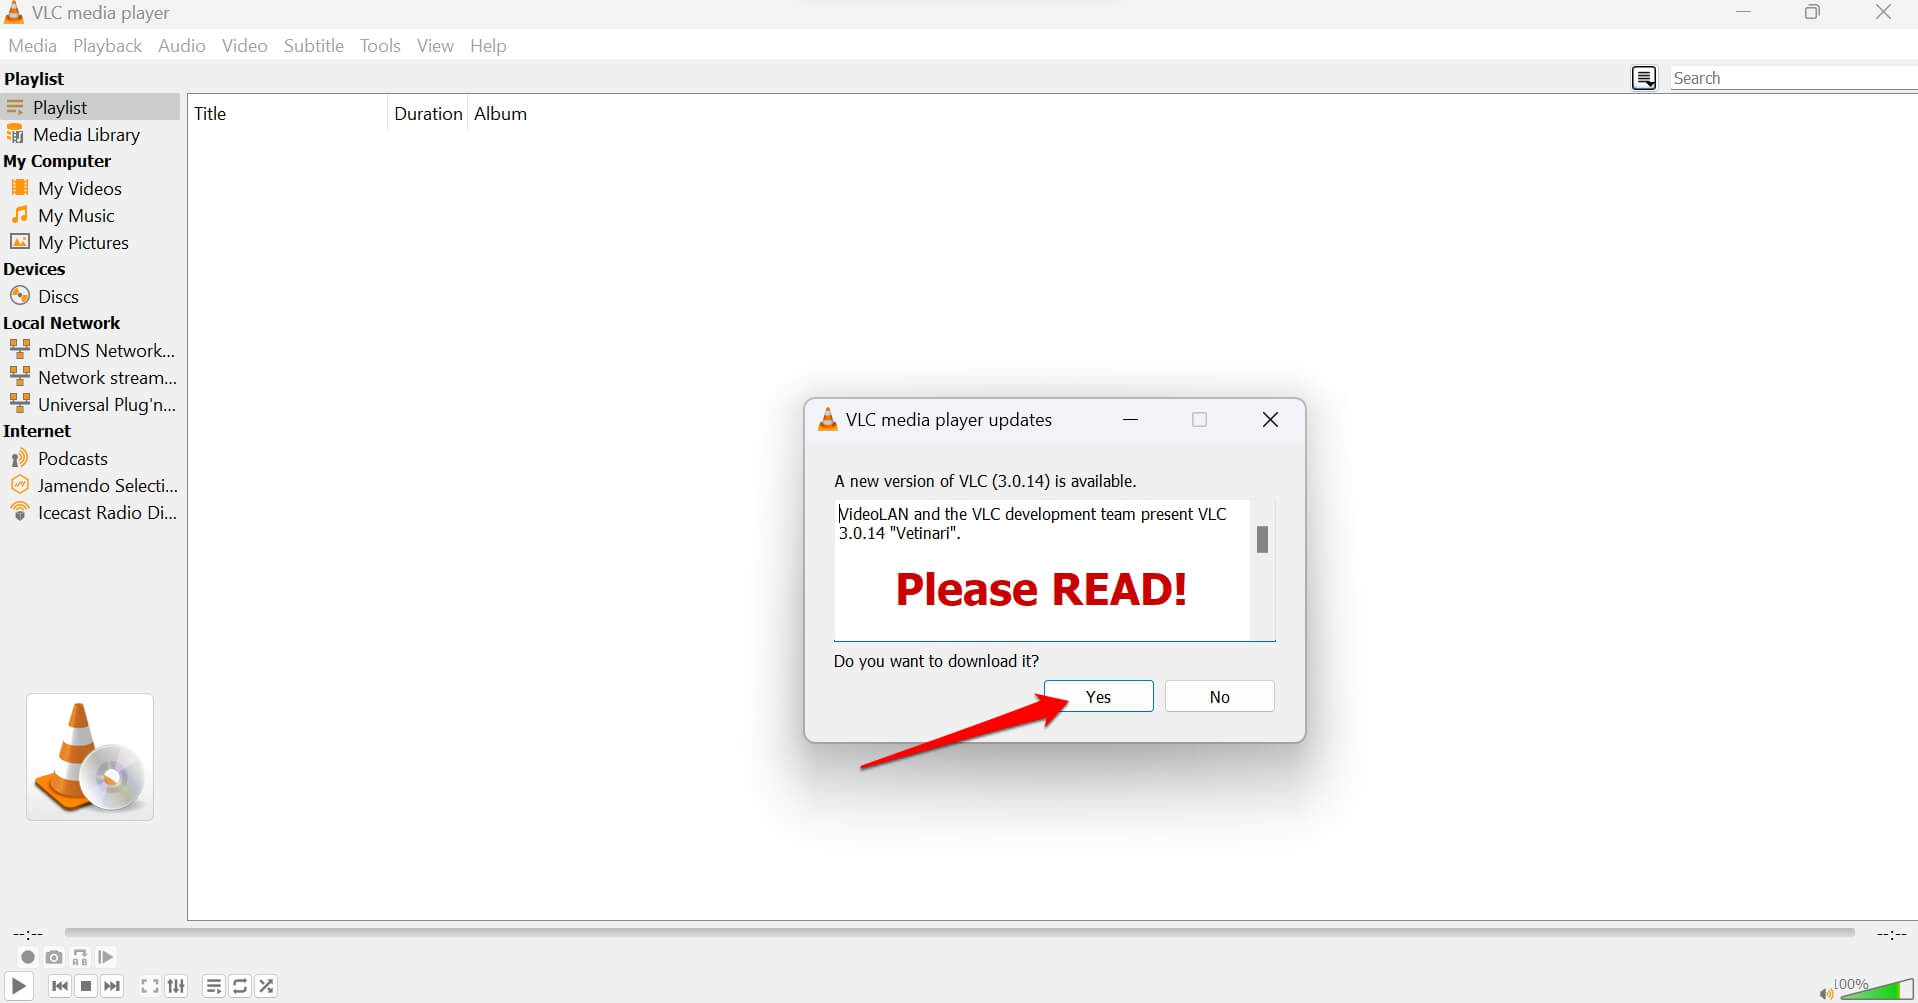
if there are any bugs on the current version of VLC installed on your PC, the subtitles may not be displaying on VLC while playing a video. Install any pending VLC media player update that is available.
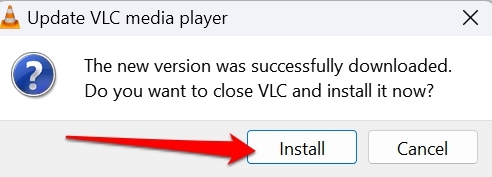
- If there is a new VLC version update available, it will pop up when you start VLC.
- Click on Yes to start the download and installation.
- Follow the instructions on the screen to proceed with the update.
- After updating VLC, relaunch it and play videos on it.
- Add subtitles by following the steps explained previously.
6. Reset VLC Preferences
When other tips and tricks are not working, you can reset the VLC preferences. Here are the steps for you.
- After launching VLC, click on Tools.
- From the menu, click on Preferences.
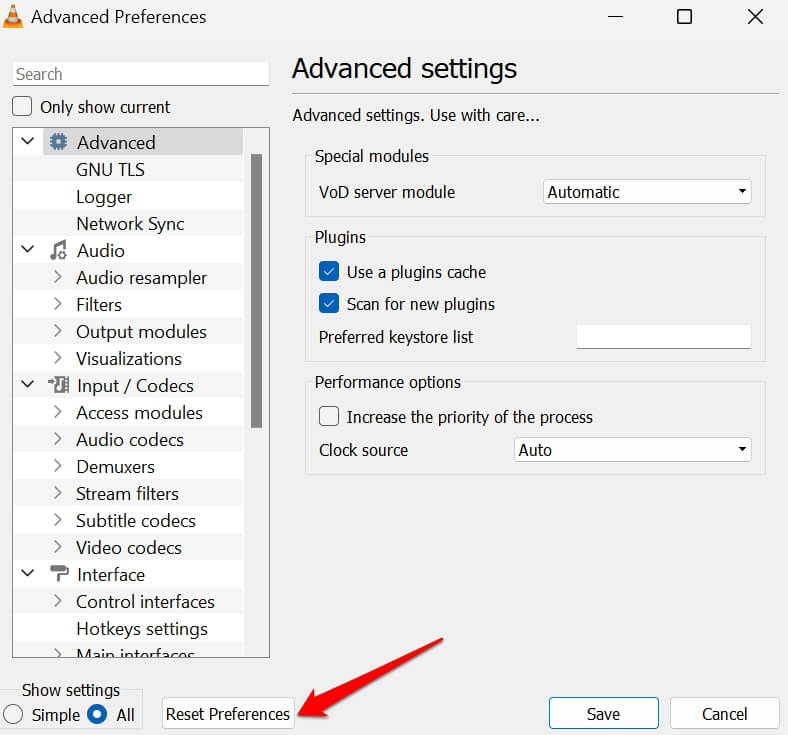
- In the dialog box that appears, go to the bottom left corner, and click on All.
- Next, click on Reset Preferences.
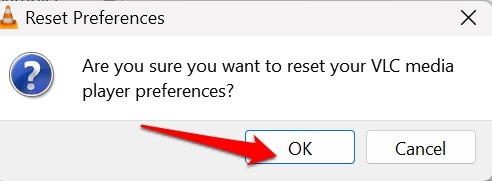
- Click OK to confirm and then click on Save.
Get the Subtitles Running on VLC
Without subtitles, watching videos on VLC will be pointless when you do not understand the language spoken in the video. To make your video-binging session more enjoyable, use the correct subtitles. Use the tips and tricks in this guide to fix the problem with VLC subtitles.