
YouTube is the most popular video platform, more significant than most social media platforms. The ease of watching videos and minimalistic video player makes YouTube the best platform to consume videos on your mobile, TV, or desktop browser. You can add subtitles and even play the videos in the resolution that suits your internet speeds and needs.
On a desktop browser, there are no unique settings to default set the video quality for YouTube. The YouTub will auto-select the video quality based on your internet speeds, which you can change on the YouTube video player. It becomes annoying to change the video quality settings on the desktop browser every time.
On a desktop, there isn’t an official way of setting the default video quality. But you can use browser extensions that can help you set permanent video quality across YouTube’s desktop site.
Steps to Default Set YouTube Video Quality on PC
- Go to Auto HD/4k/8k for YouTube in the Chrome Web Store.
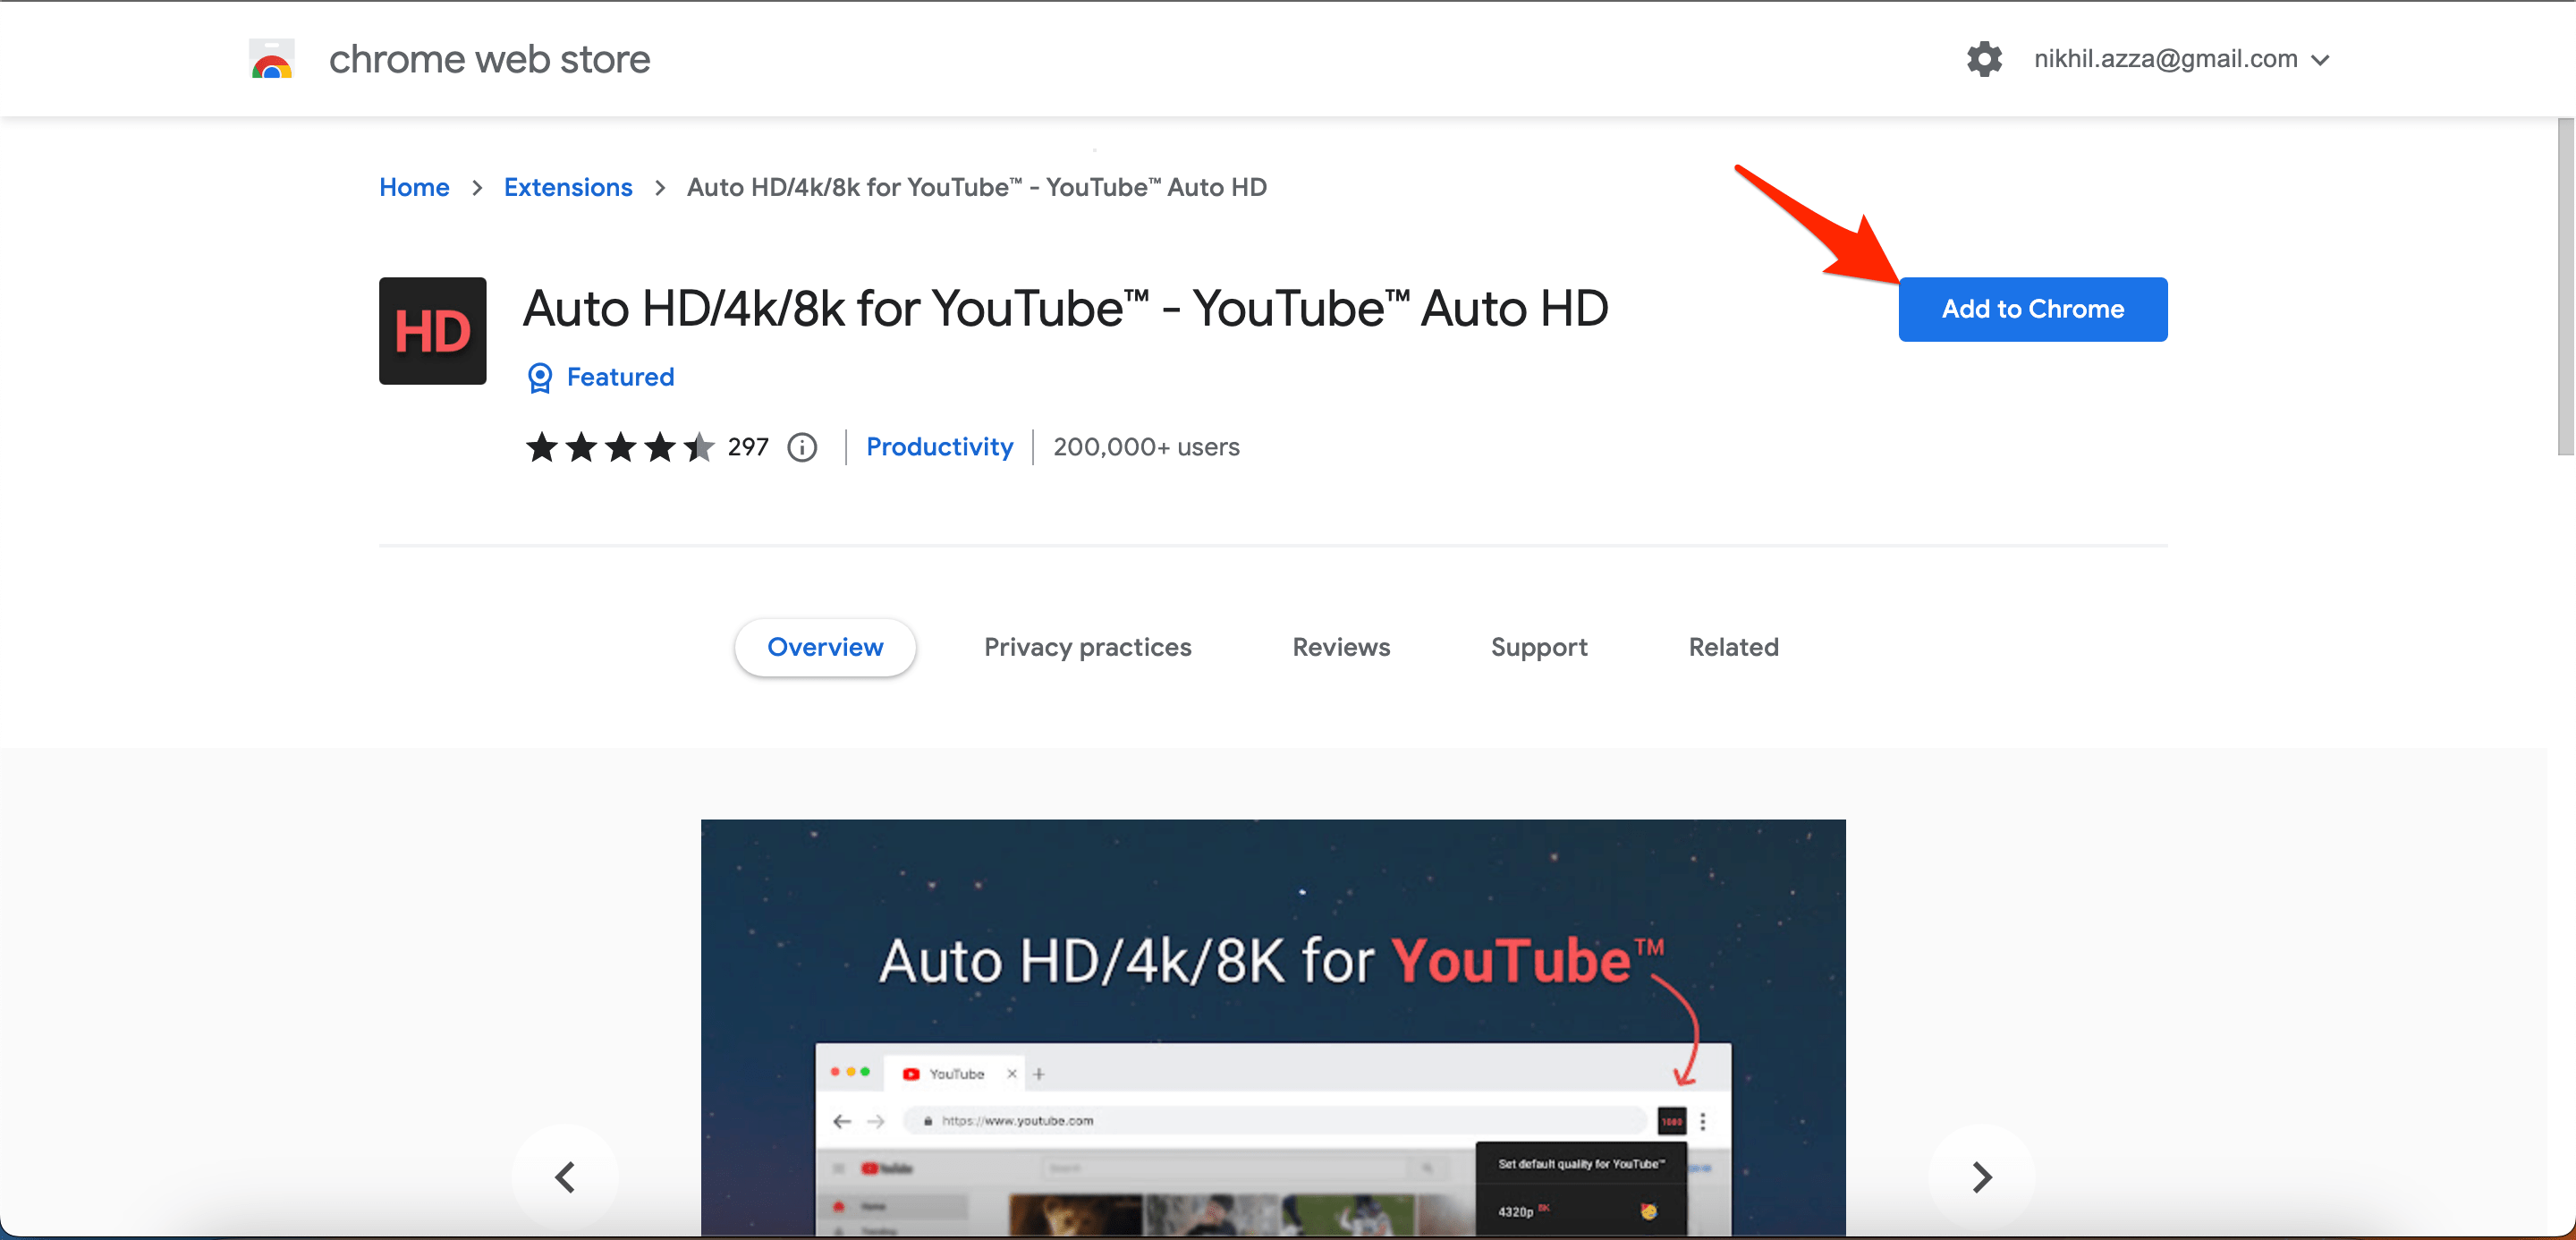
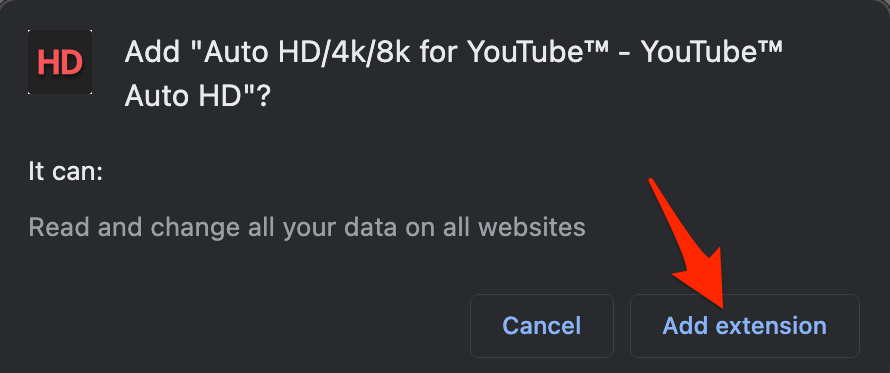
- Click Add to Chrome and click Add extension from the pop-up.
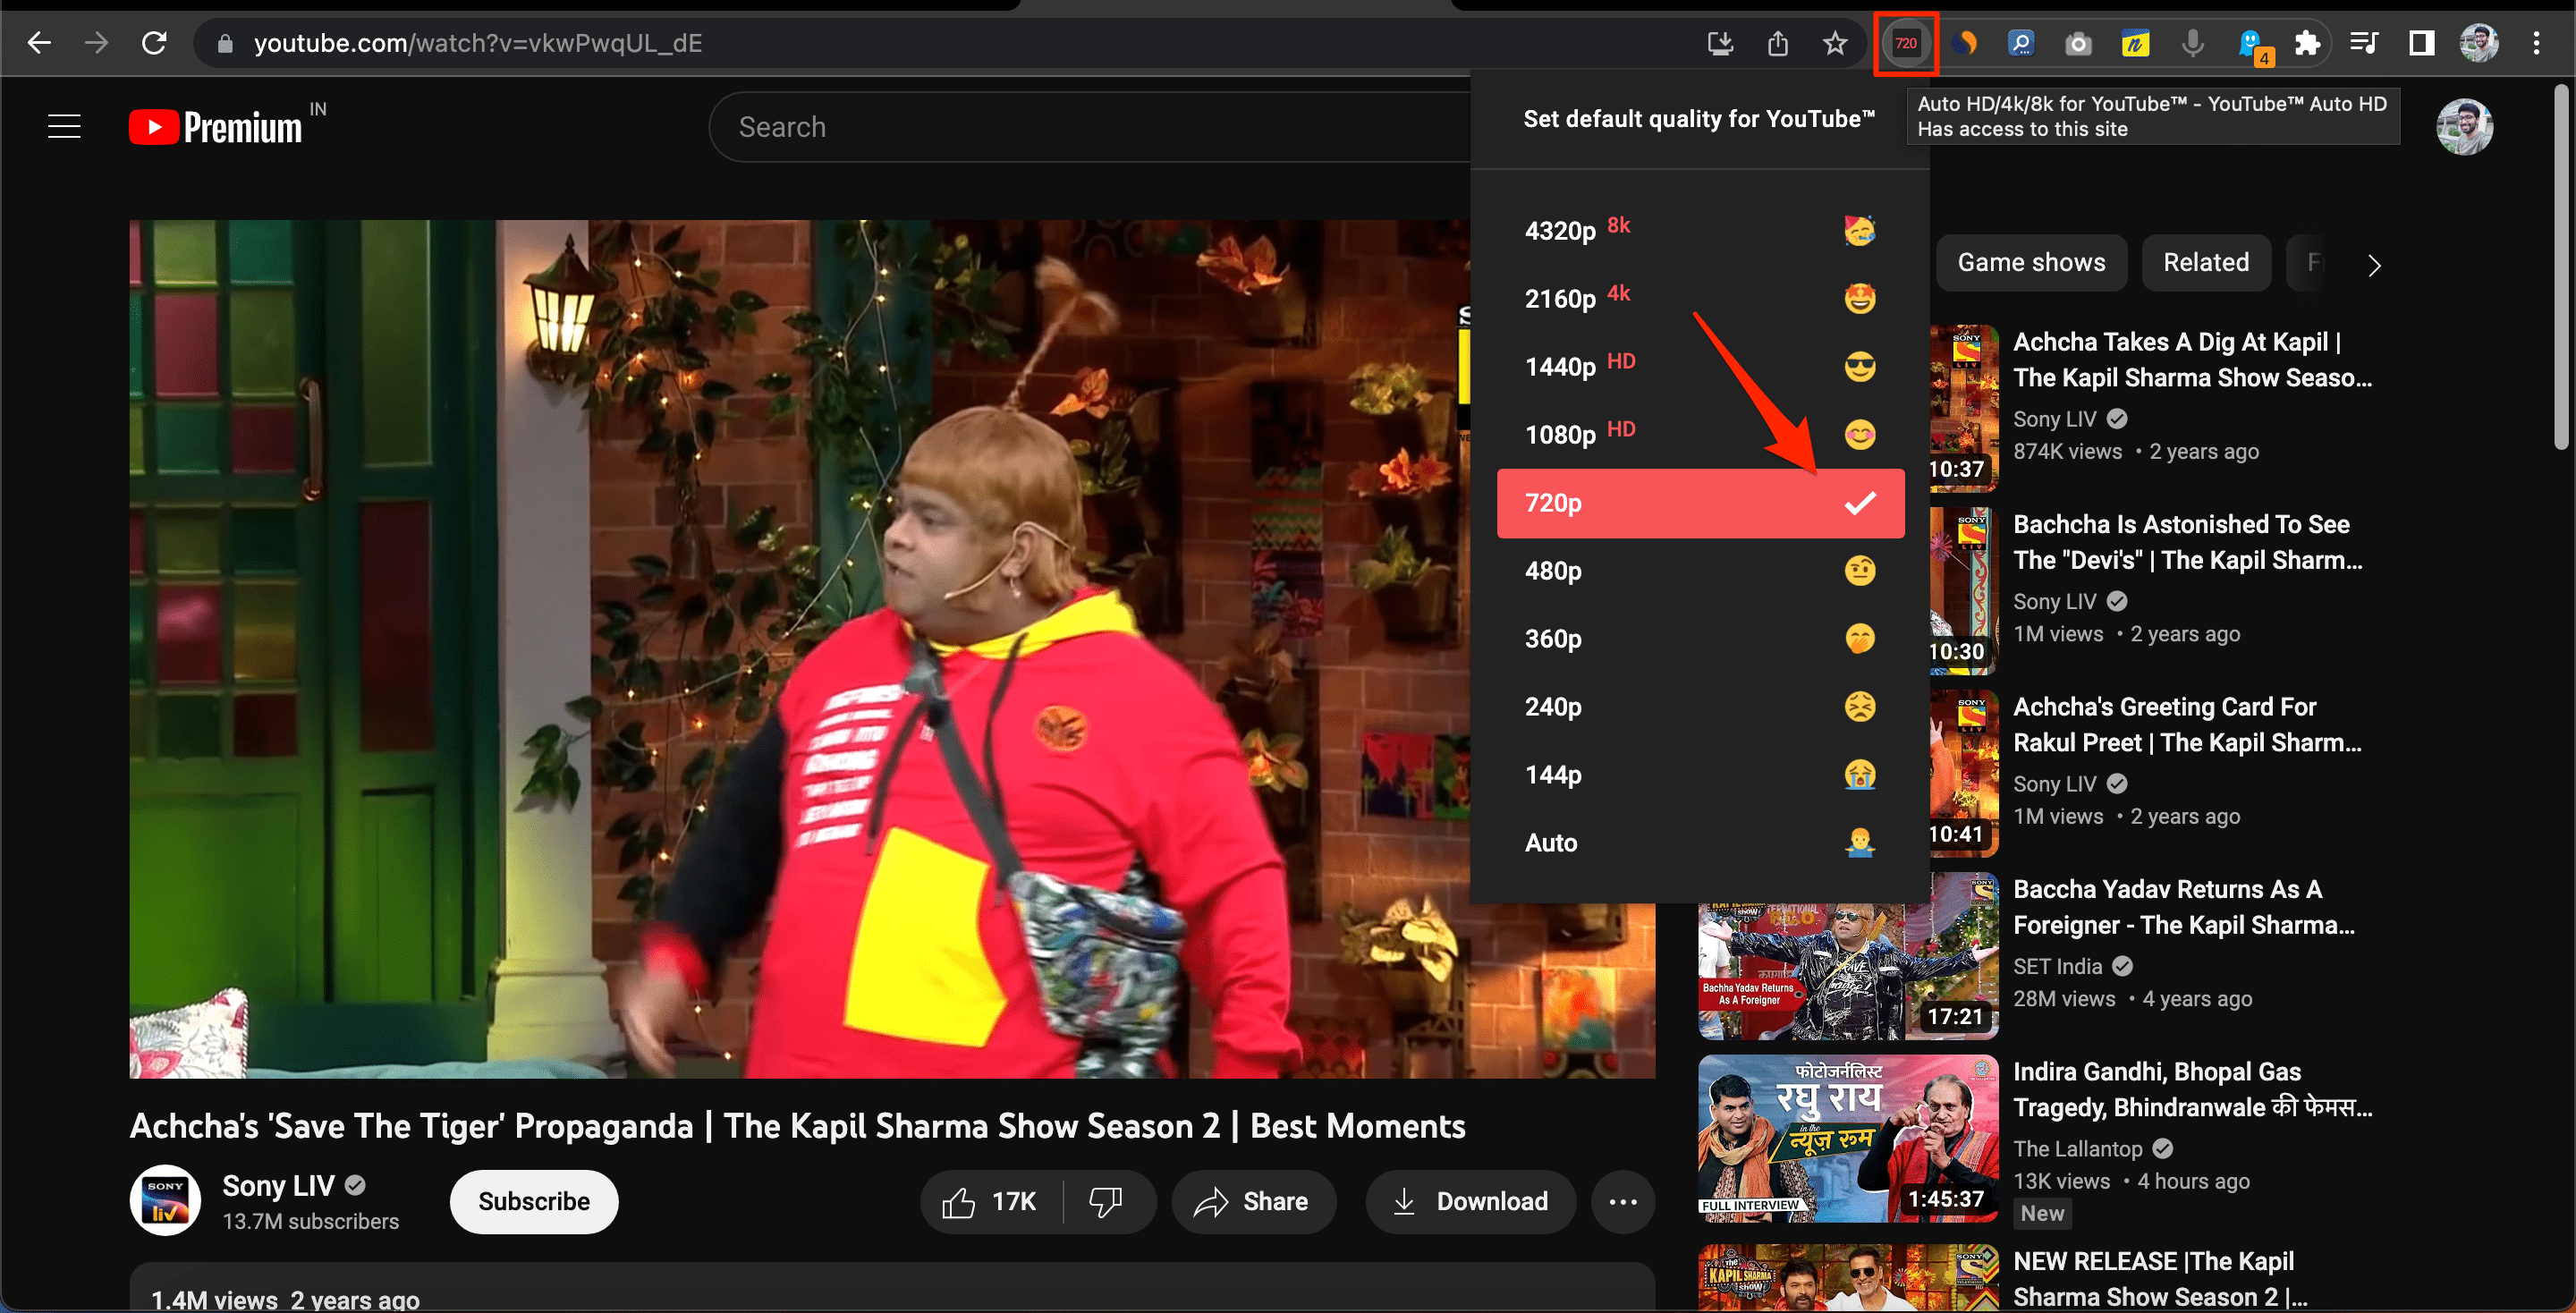
- Go to YouTube via your browser.
- Click the Extension icon on the browser extension menu. The extension will launch a pop-up with different quality options.
- Choose your preferred quality for YouTube videos from the options. The extension will automatically save your selection as permanent default and refresh YouTube to apply your changes.
That’s with this simple browser extension, you can set the default permanent video quality for YouTube Videos in Chromium-based desktop browser.