
MacBook is one of the smoothest and most feature-rich desktop systems available. From media editing to office work, you can do any job with ease on your MacOS PC. Like any other desktop, Mac also comes with a built-in screenshot feature and screen recording option. If you are looking to record only a specific part of your MacBook Desktop screen. Then below is a simple guide to recording only a part of your MacBook screen.
Steps to Screen Record a Part of MacBook Screen
- Open Spotlight search by pressing
Command⌘+ Spacebar. - Here search for Quicktime Player and tap on it to open.

- If any window opens, click cancel.
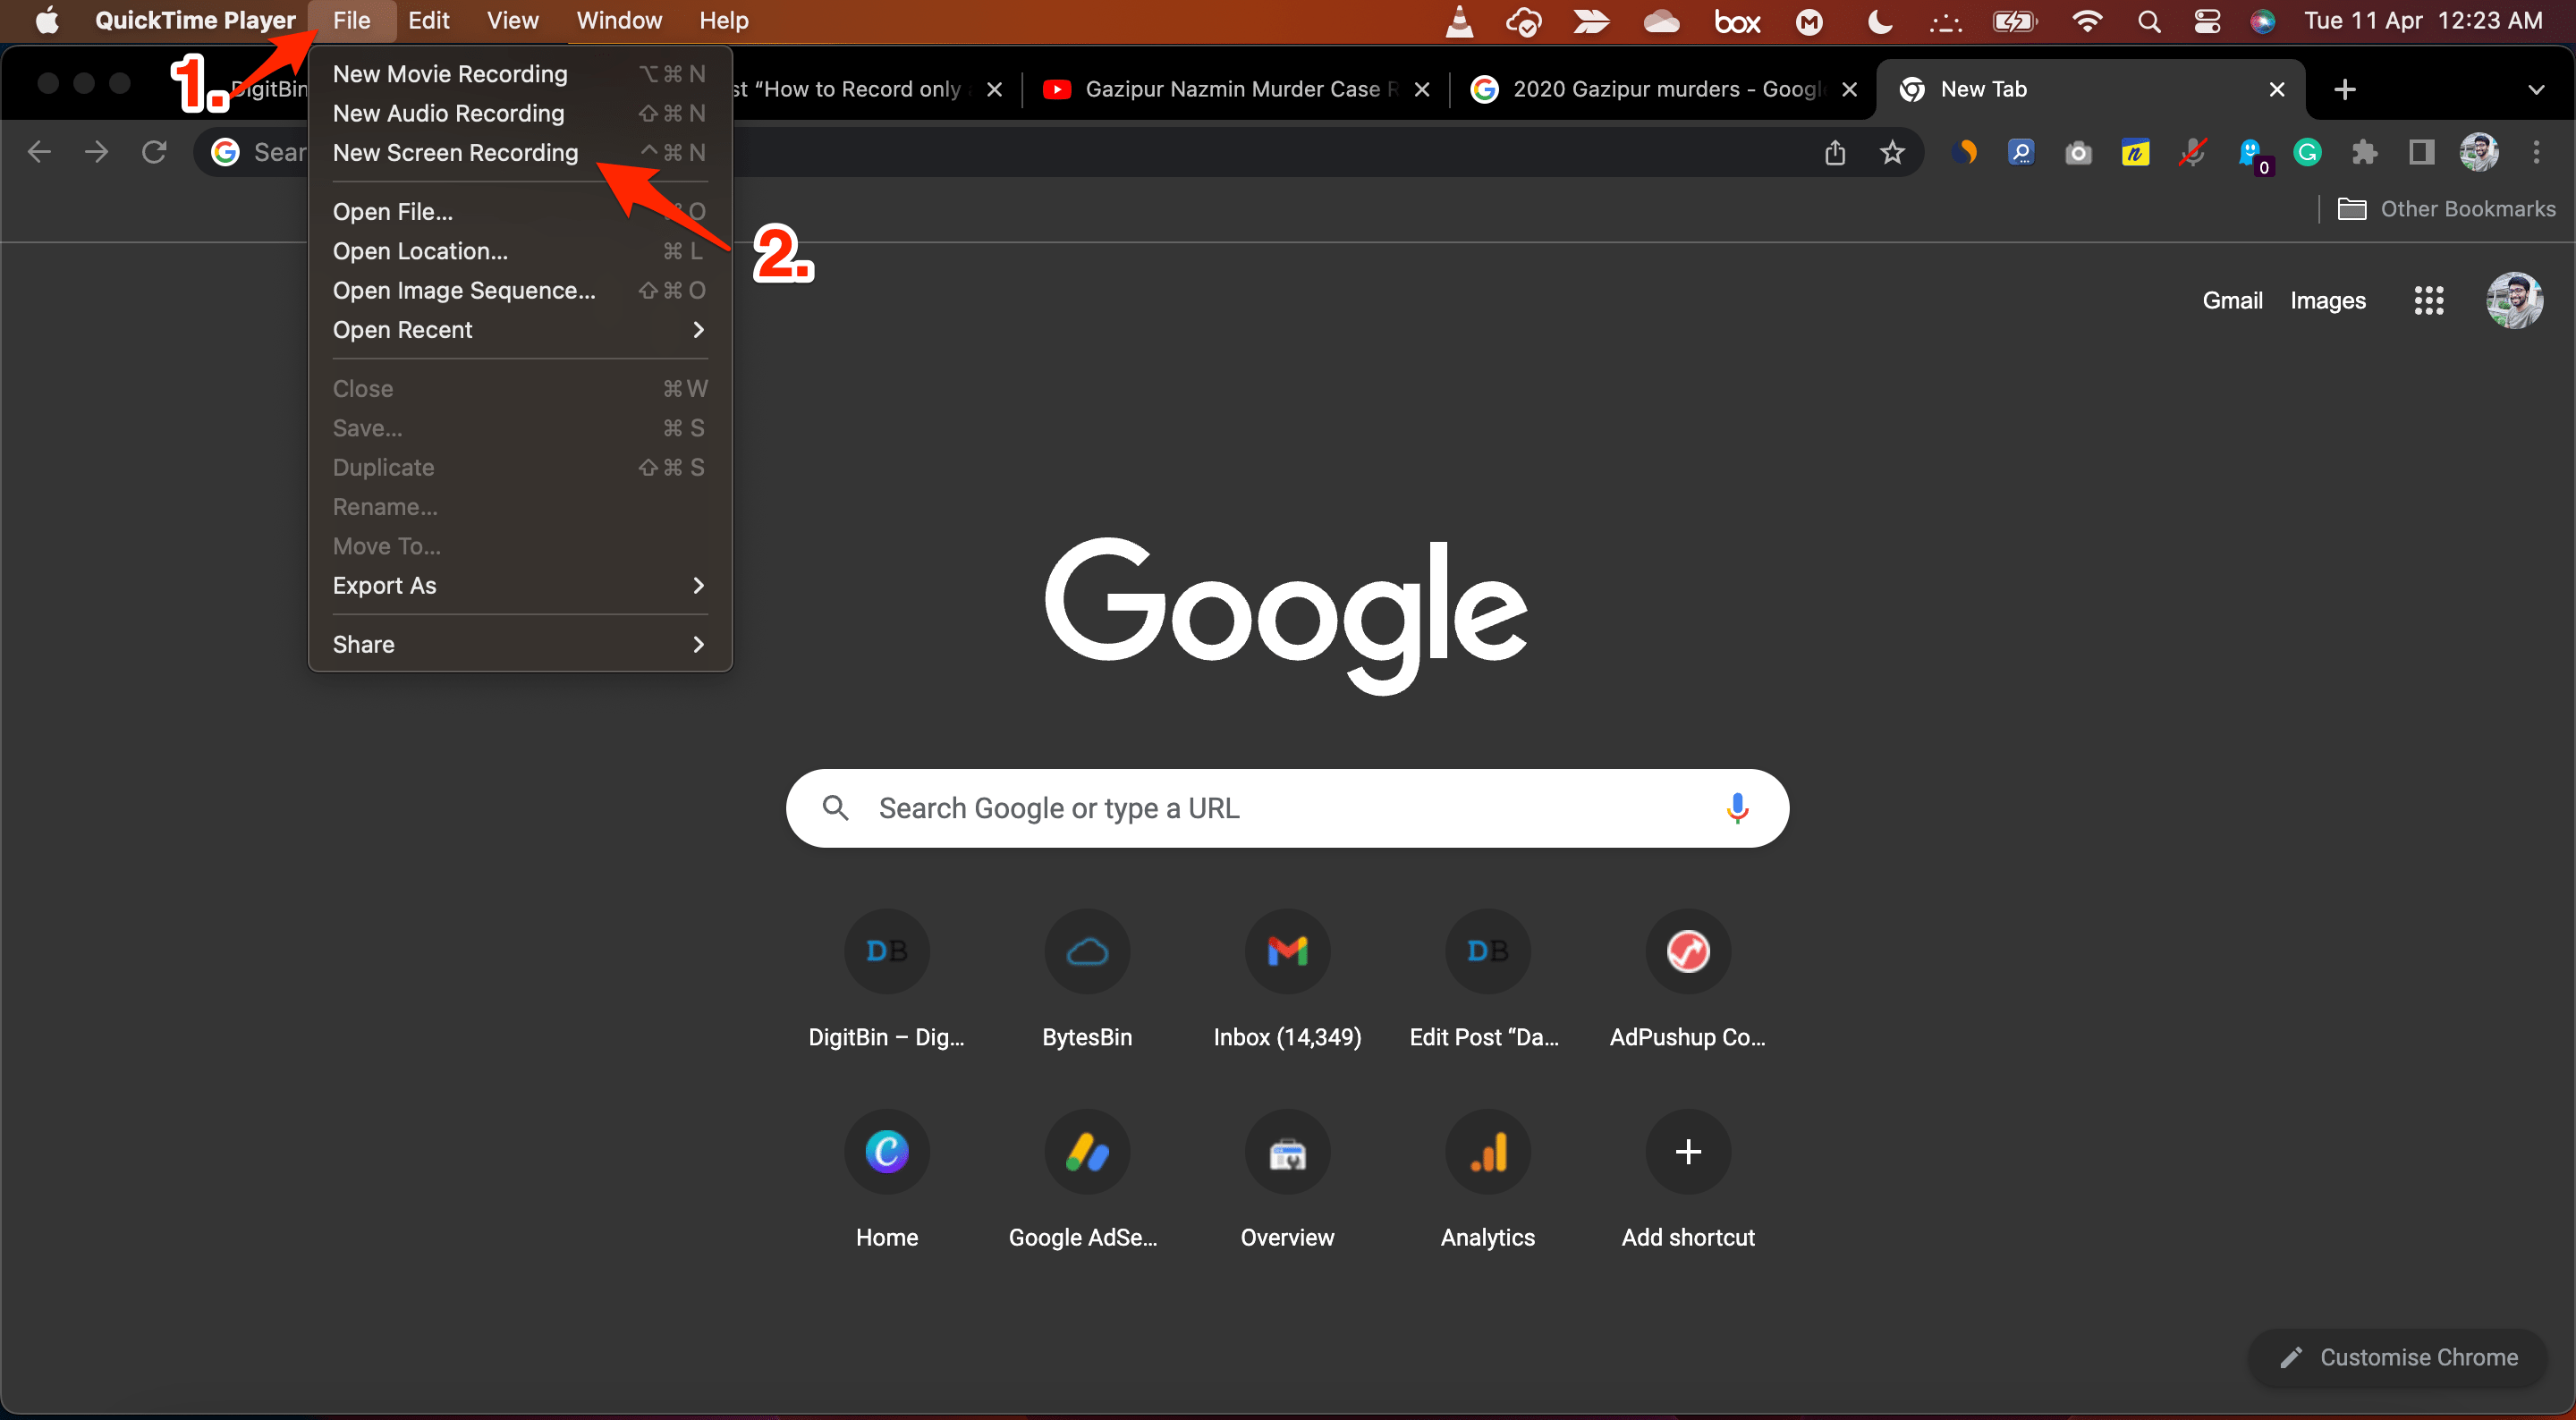
- Now on the top menu bar, click on File.
- Here select New Screen Recording.
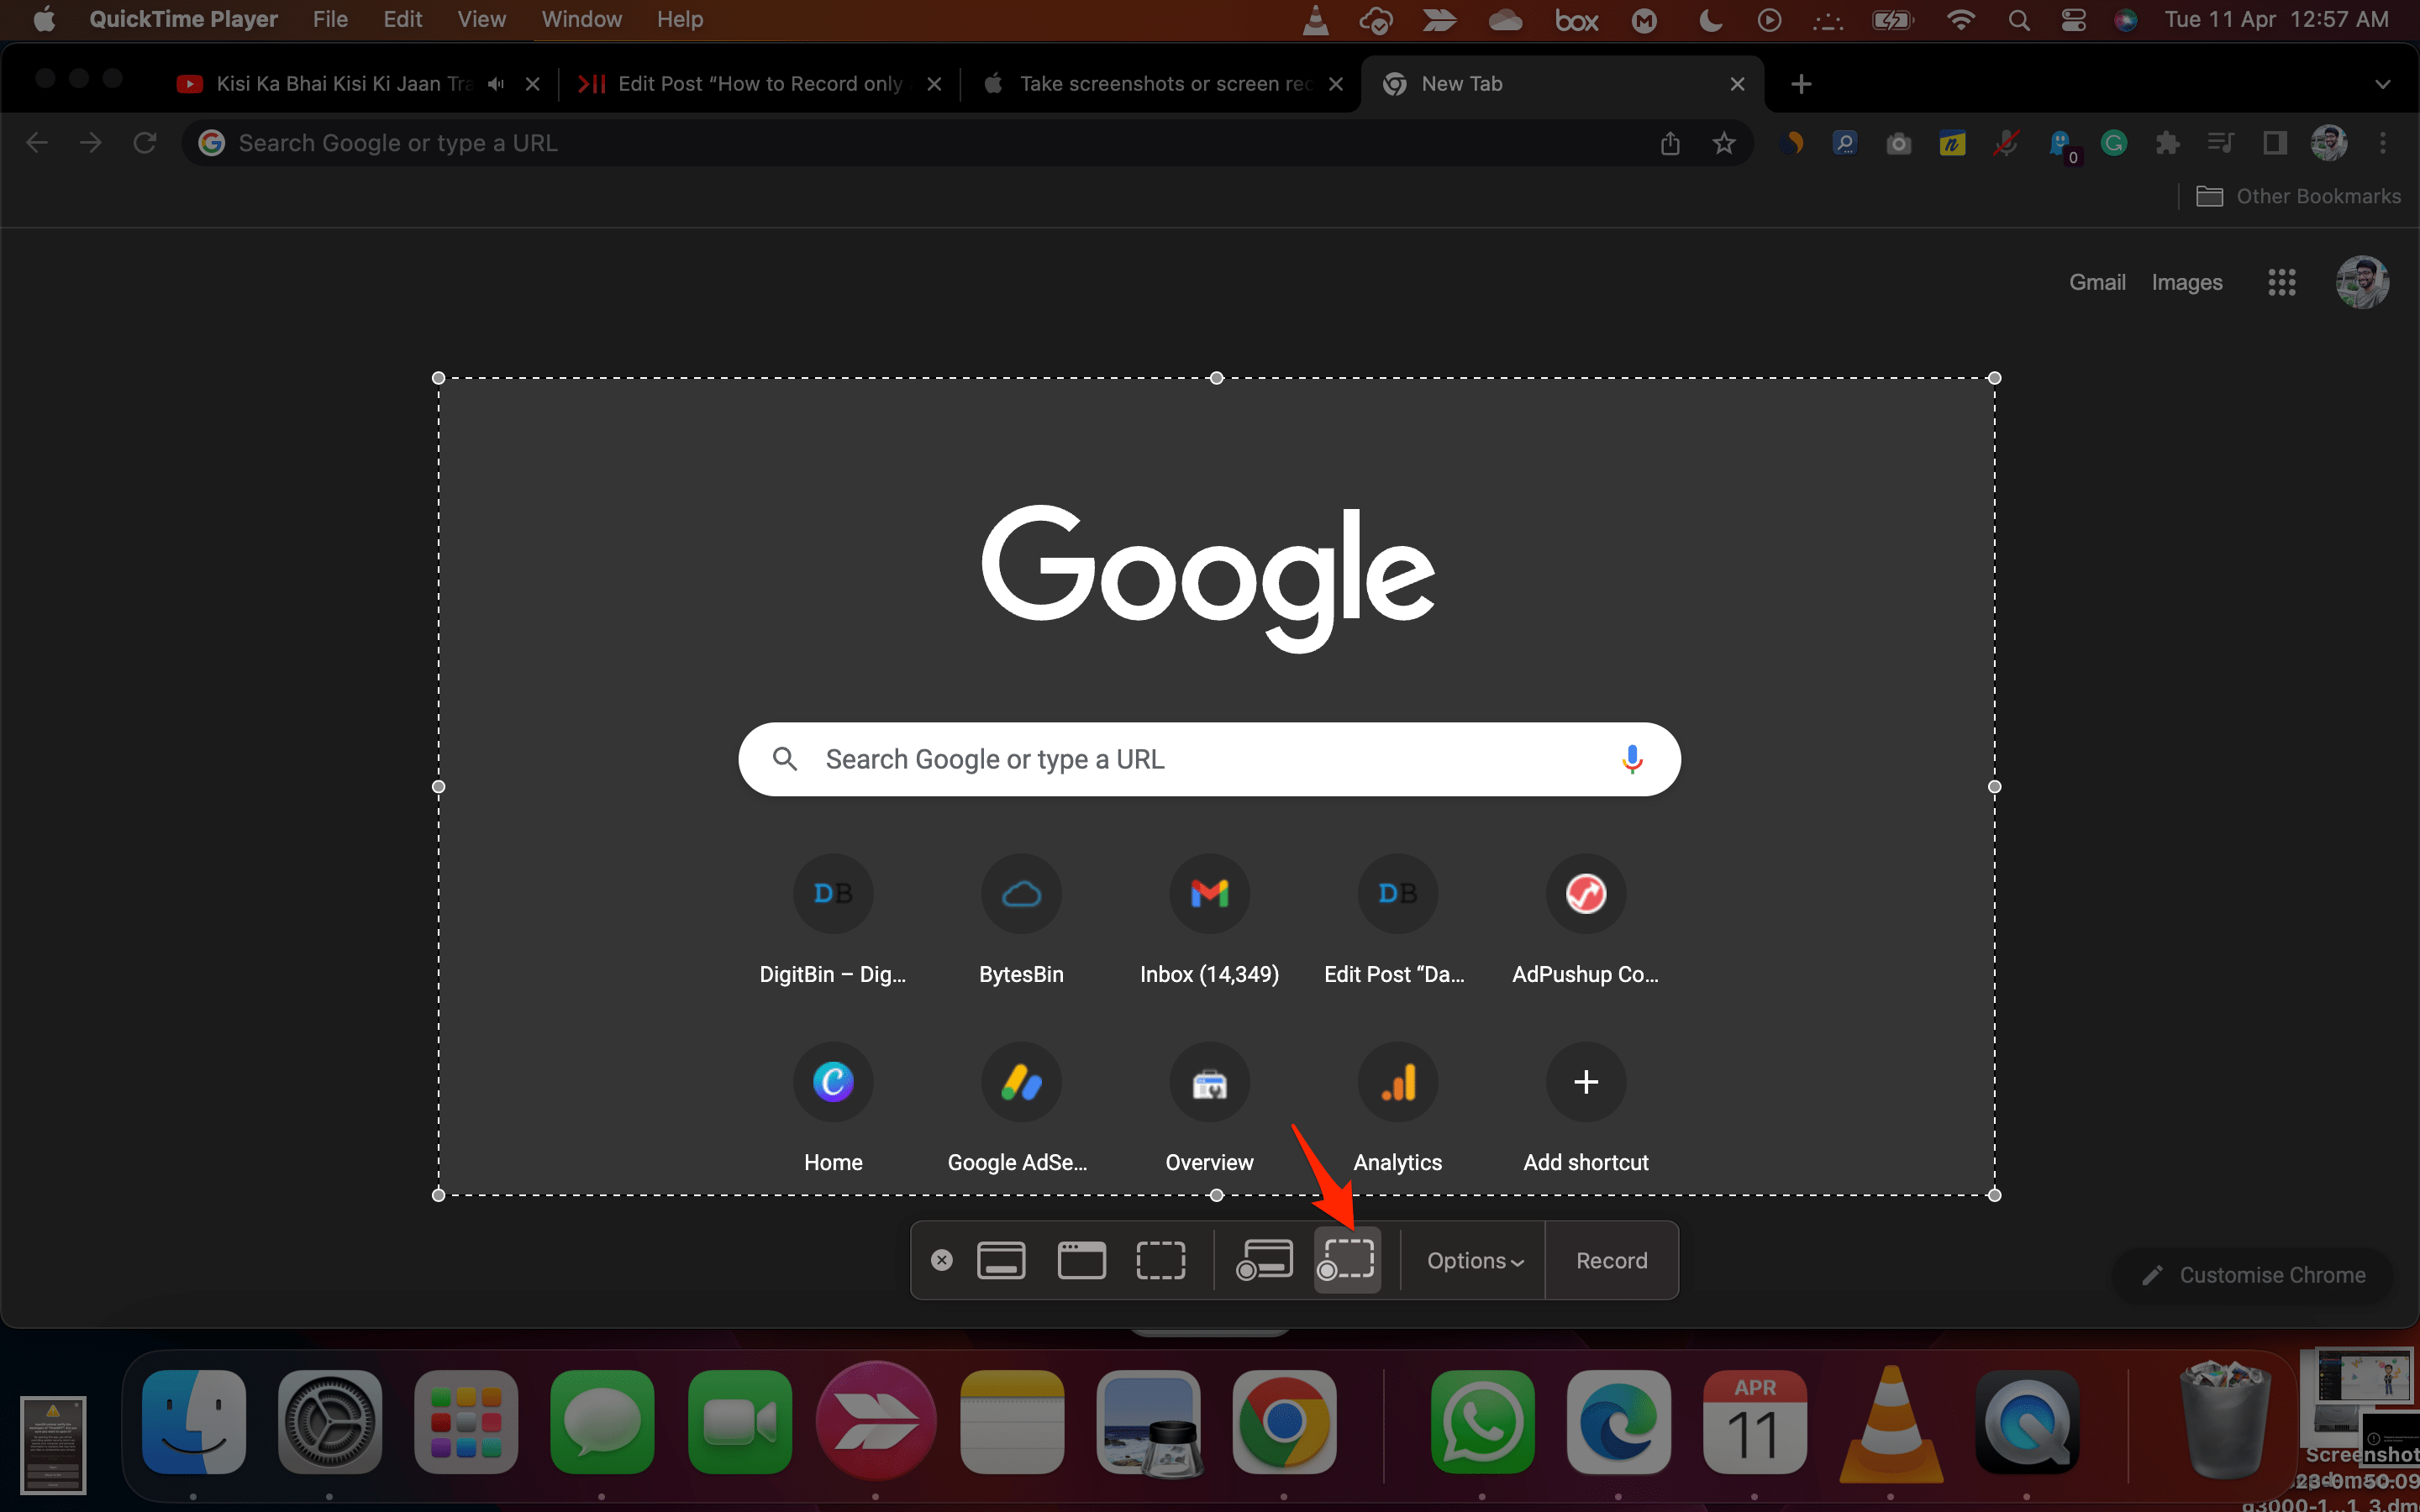
- A dotted box will appear on the screen with recording options at the bottom; drag the box to create a portion of your Mac screen you wish to record.
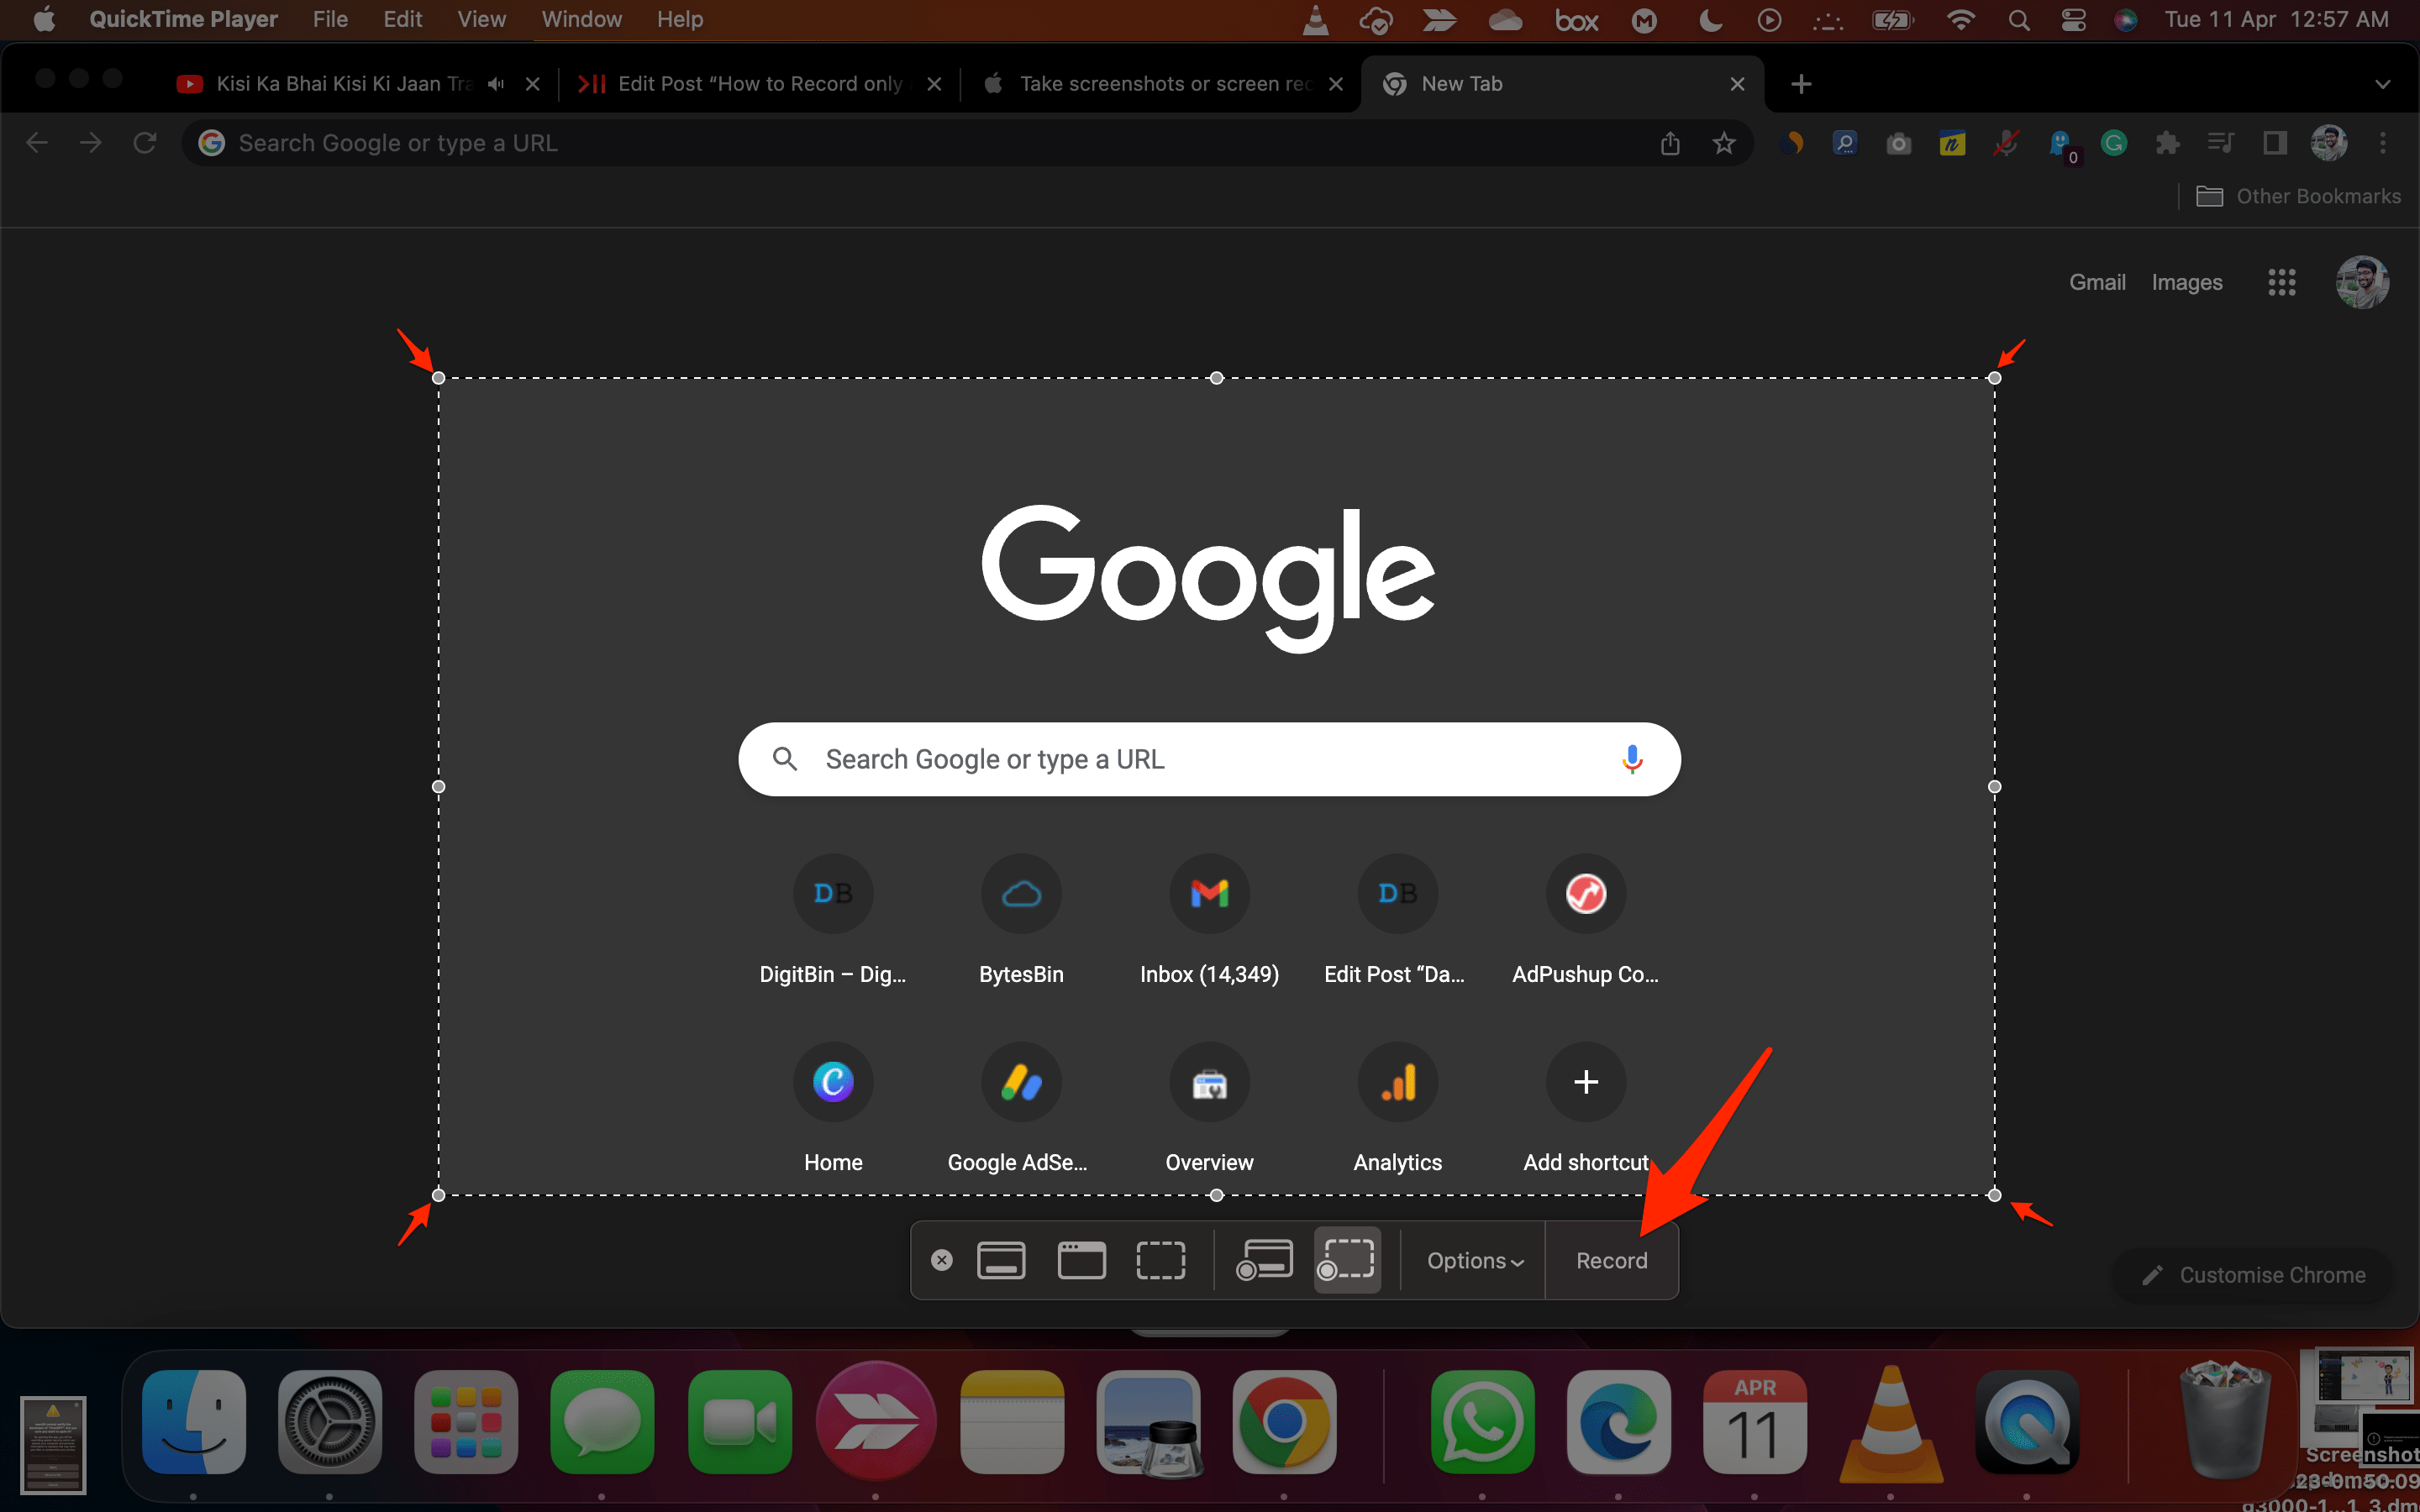
- Once done, click on Record; only the selected screen portion will be recorded.
- Once the record is done, click the stop icon on the top menu bar.
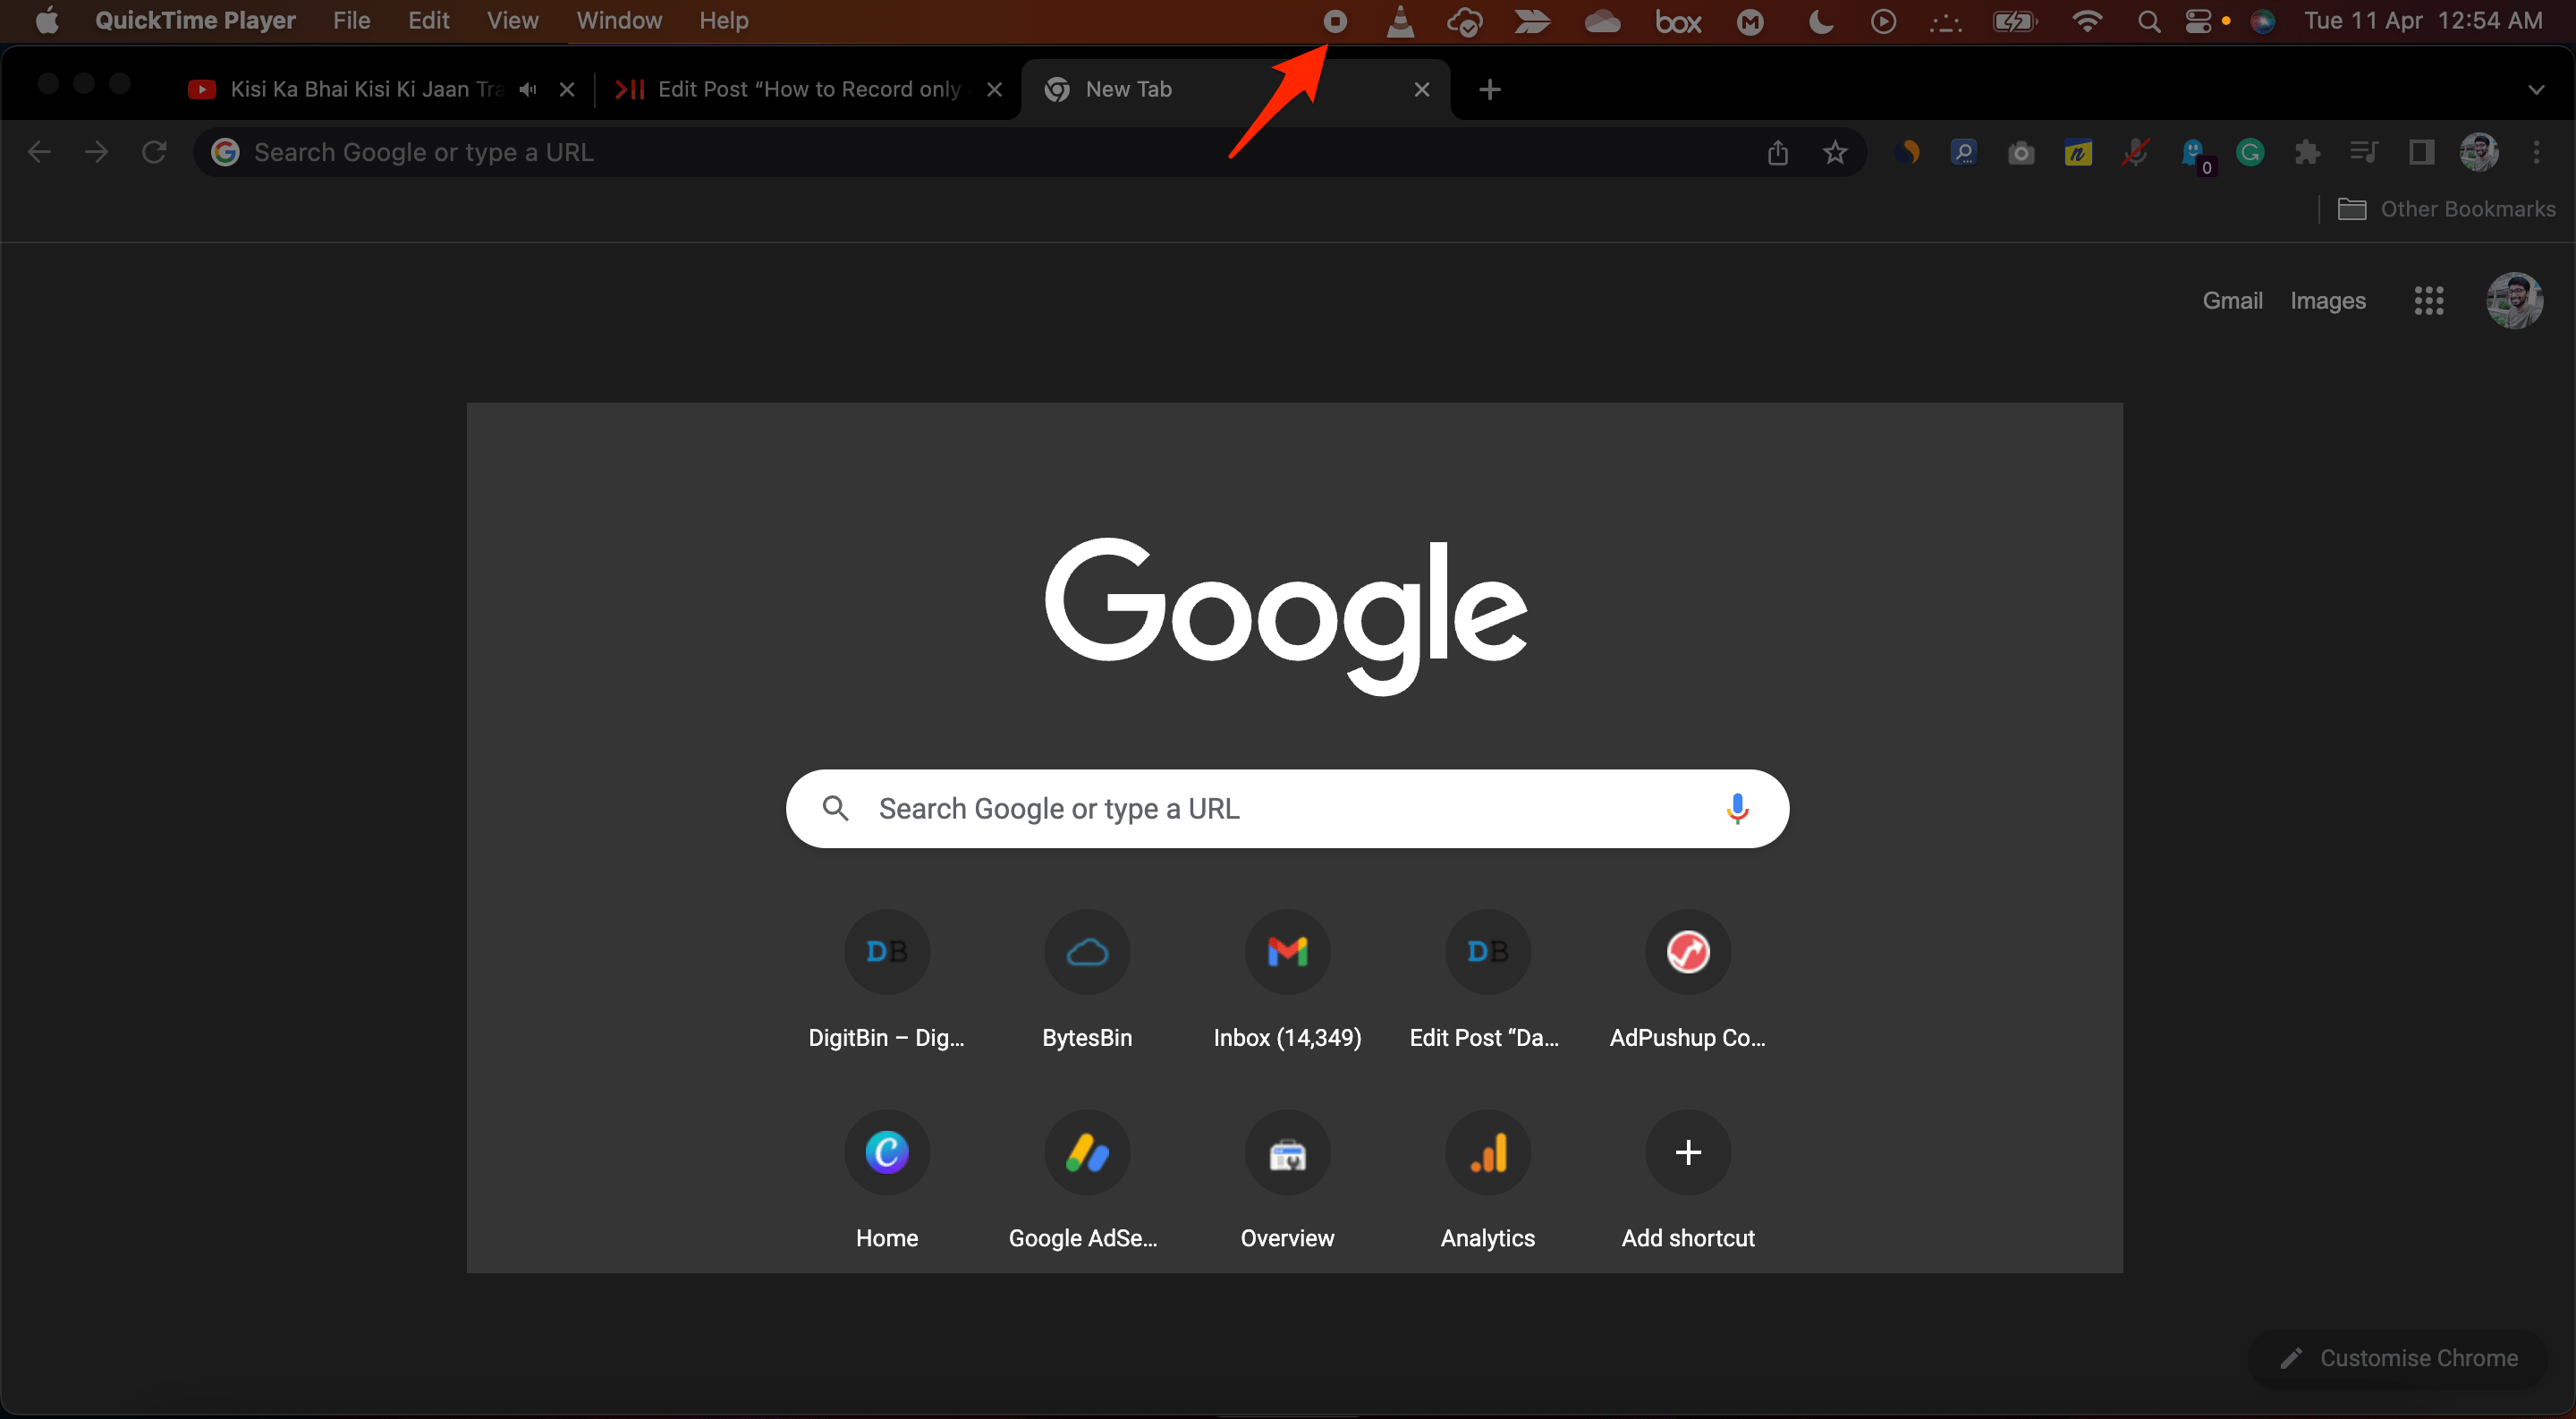
- Done! Save the file and enjoy the recording.
Alternatively, you can click on shift+command+5 to get the recording options. Here click on the record selected portion option and click Record.
I hope this small guide was helpful for you to record any selected portion of your Mac Screen. Do comment below for any help!